Rocker re-do

I am totally embarrassed that it has taken me 2 weeks to write this post.  I did this DIY on April 19.  I know it was the 19th because that is my Nana’s birthday.  The kids and I were going to visit that day, but she wasn’t feeling well so we ended up having an unexpected afternoon at home.. and unexpected time for a project!!

I have had this rocker in my possession for my entire adult life.  When I moved in to my first apartment at 20 the rocker came with me.  I didn’t know I was quite so attached to it until it broke and we were trying to decide what to do with it.  You can’t just part with something you have rocked your kids to sleep in!  And actually it was my parents before mine so I was rocked to sleep in it oh so long ago. Anyway, Skyla and I have a particular connection to the rocking chair as every night after her 2 books she and I rock and sing songs together.  It had to be fixed!

rcc

The blankets made it useable-ish.

So it was a bit of a process. And only time will tell if it holds up or not but this is what I did:

Supplies

Supplies

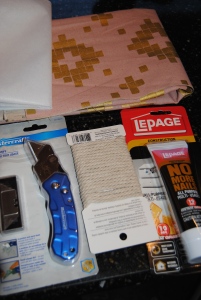
Supplies I used:
Exacto knife
Glue
Thick linen fabric
Interfacing: medium weight
Twine
Not shown:
craft pliers. I think from an old beading kit
towel
screwdriver
rag appropriate for wiping away glue.

Step 1:
Unscrew and take the seat and seat back off the frame (or ask husband to do this step)

Step 2:
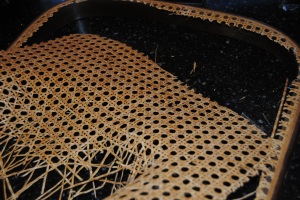
Cut away excess wicker. Leave a little bit to help you pull it all out.

Do make sure you leave some to grab on to!

Do make sure you leave some to grab on to!

Step 3:
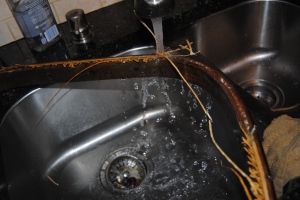
Run the wood/wicker under water. Be patient here. I did google how to do this. I even listened to a creepy computer voice tutorial… which I had to stop about a minute in because it was just too creepy. They all said water would loosen the glue. And it did, but it did take some time. I had a towel underneath eventually and an apron on.  It was messy!

DSC_0193

Step 4:
Pull all of the wicker and wood out of the channel. Again I’m going to say be patient here. It took me some time. Once I got going it went relatively quickly. I tried using gloves but tore a hole through them. I eventually used the pliers which did help.. It was not a kind project on my hands, lets put it that way.

Step 5:
Let it dry. I put the hoops outside and let them dry while we did our dinner and bath and bed routine. It was a few hours. Not sure it needed that long, but they were dry by the time I got back to them.

Step 6 (the start of the fun parts):
Trace the shape of the hoop (outside) on your fabric. I did exactly that shape!

DSC_0199

Step 7:
Cut out the fabric in to the shape you traced (not sure I really needed to make that in to a step?)

Step 8:
Iron on interfacing. (To the back of the fabric!) I wanted to make the fabric as thick and sturdy as possible. You can do step 7 before 8 as well. 

Step 9:
Line up/lay out the fabric so you have it all going in the right direction.

DSC_0202

Step 10:
Apply glue liberally in to the channel.

DSC_0203

Step 11:
Place/shove/tuck fabric in the channel. I used a screw driver here to shove it all in. I started with the 4 corners and then filled in the rest of the spaces with glue/fabric until the whole things was done.

DSC_0204

DSC_0205

Step 12:
Apply glue in channel again (I used my fingers)

DSC_0208

Step 13:
Shove twine in to channel. The original seat had the wicker and then a small piece of wood shoved in to the channel to hold it in.  (Wipe away excess glue)

DSC_0209DSC_0210

(repeat steps 6-13 with both the rocker back and seat)

Step 14:
Let them dry.

Step 15:
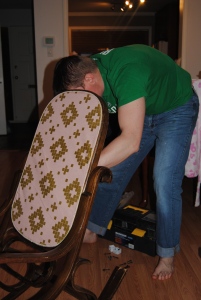
Put the rocker back together, or ask the husband to do this (I like to make him feel like he’s handy)

DSC_0215

Step 16:
Cross fingers that it would hold when sat in/on.

I let the chair dry overnight and wouldn’t let the girls touch it in the morning. They admired and wanted to sit in it but it was left to dry all day. I got home before everyone else that day and tested it and put it back in Skyla’s room.

DSC_0226

So far (2.5 weeks) it has been fine. Below is a picture taken today. The fabric stretched a little bit initially but seems to be holding this shape.

After 2.5 weeks of daily use!

After 2.5 weeks of daily use!


So not going to get this for much longer!

So not going to get this for much longer!

Don’t know if I would recommend doing what I did, as (again) I am not sure how it is going to hold up.  I do know mine turned out cute and will likely last us until she no longer wants to sit in my lap and sing songs before she goes to sleep. As an aside, everyone that has come in to our house since has been taken in to her room and shown the chair and told “my mommy fixed it”.  If that doesn’t make it worth the time and effort I’m not sure what would!

Until Next Time,
Ashlee
Whyknotmom

Back in style refash

This is a super easy refashion!  Sometimes you find used/vintage items that only need very small fixes to work with today’s fashion trends. Some pieces are classic and never really go out of style and those are the real finds. So this dress had this classic accordion pleat in a “midi” length.  Not my first choice of colour but definitely not a deal breaker.

DSC_0185

Luckily the zipper was in the back.  First thing I did was mark where I needed the zipper to stop and sewed a couple of quick lines so that I didn’t lose the zipper when I cut the dress in half.

DSC_0187 DSC_0189

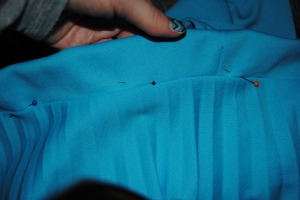
And chop and pin down to where I wanted to sew.   I followed the line where the original top was attached to the skirt.

DSC_0191

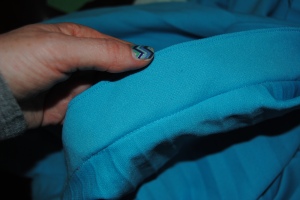
Then I sewed along the top to make it look a bit more finished:

DSC_0194

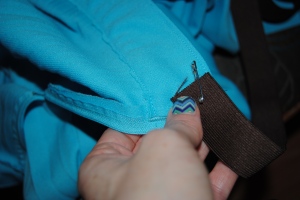
And finally fed through some elastic and sewed up the sides to keep the elastic in place:

DSC_0195 DSC_0197

All I had to do was wait for an appropriate (spring) day to wear it.  That day came yesterday!

IMG_2286

LOVE!  I have so many tops that I can wear with it to dress it up or down.  And the colour is great for this time of year.  I was even given a beautiful pair of used floral pumps this week that go perfectly.

Until next time,
Ashlee
Whykotmom

Sarong to kimono cover up

I was busy last week planning and packing to go to Las Vegas with my girlfriends. One thing I was lacking was a cover up. I had an old sarong but I’ve always found them really annoying unless I remember to bring safety pins. Besides, I wanted something to be able to cover up my shoulders (I have a very low sunshine tolerance). Light bulb! I held it up and figured it would probably be the right size to make a kimono coverup.

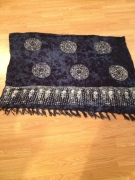
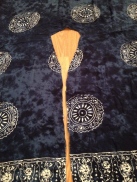
So here we are, my old sarong:

Folded in half of course

Folded in half of course

So I folded it over again and drew out the shape using a ruler and chalk.  I didn’t measure, I just winged it.  I figure with something like this there is a fairly large margin of error.

My chalk lines

My chalk lines

And cut out and opened back up

And cut out and opened back up

Then I drew out the front and neck opening with the chalk again and cut.  I made sure to open up the fabric before making that chop so I didn’t cut the back of the kimono.

chalk lines for neck and front opening

chalk lines for neck and front opening

fabric all the way open to cut out the neck hole

fabric all the way open to cut out the neck hole

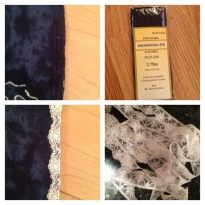
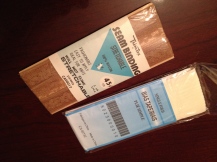
Now here is where I cheated, as I almost always do to avoid having to do a roll over hem.  I used seam binding and lace trim for the arm edge and for the neck/front edge.  This is what I used and how it turned out:

cheater tools

cheater tools

Sewed up the arms and sides with a straight stitch and zigzag so it wouldn’t fray.

Finished and tried it out!

super impressed hubby in the background :P

super impressed hubby in the background 😛

Oh but the fun didn’t stop there because I sent this pic to one of the girls coming on the trip, who also works in my office.  She wanted one too and her sarong was on my desk the very next morning to play with.

Amy's sarong

Amy’s sarong

All cut out

All cut out

And the cheater tools for hers.  I bound the side seams with the bias tape.  It was such a light sheer fabric I wanted to make sure the seams held. 

And the cheater tools for hers.  I bound the side seams with the bias tape.  It was such a light, sheer fabric I wanted to make sure the seams held.

And here we are in our perfect beach cover ups for a Las Vegas pool party!

We should have really taken a pic a couple hours later when the place was so packed we could barely move!

We should have really taken a pic a couple hours later when the place was so packed we could barely move!

Until next time,
Ashlee
Whyknotmom

Quick fixes

It has been another busy month round these parts.  I am off to Las Vegas in 3 sleeps and that is absolutely the way I like to go.  Work like crazy, lots of fun thing with the kids and then go and relax.  Don’t worry, I did have time for a few refashions.

In a continued effort to fix things in my own closet when I get the itch to have something new I was able to find a few things to tinker with.  

One is a new (to me) item from my cousin but the others came from my closet. 

First up a quick button fix for a blazer that was too small for my cousin and missing a button.  She and I have a very different sense of style.  Mine is a lot more toned down.  So while I liked this blazer and a gold buckle detail on the back I was not a fan of the (what I would call gaudy) gold buttons.  Not the greatest pictures but you get the idea.  Gaudy to subtle.. still gold to match the gold detail in the back.

DSC_0202 

DSC_0204

old and new buttons side by side

Next up was a refashion for my trip.  I have these great linen trousers.  I got them for a steal because 2 of the belt loops needed to be fixed.  I was never happy with the white panel along the front.  I thought they would look way better with defined pockets.  So that is what I did!
linnen

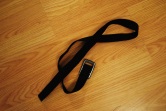
Then we had a week at home when my oldest had pinkeye (lovely) so I thought she needed a pick me up and got to work on a refashion for her.  All I really had to do was take up the shoulder straps. I had to make darts on the back straps so they matched up evenly.  I also shortened the belt rope.  Turned out super cute!

IMG_2097

And one more for me, also for my trip!  I had these cute wedges that I purchased online last year.  The blue was OK.. but I’m really hard on my shoes so they didn’t stay nice and blue for long.  And they really didn’t go with very much in my wardrobe.  So I decided to paint the canvas (blue) part.  I just used acrylic craft paint that I had on hand in a khaki greenie-brown.  It was a very easy project.  I painted away and wiped the excess off the leather parts as I went.  They turned out way better!

IMG_2129

I have 2 more refashions to share but they get their own posts, stay tuned!

Until next time,
Ashlee
Whyknotmom

Scarf shirt refash

Oh how I love an easy refashion, especially when it works out this well!

DSC_0190

Last month my family lost our Papa at age 87.   He was a great man! I couldn’t have asked for a better grandfather and a father figure really. He is survived by my Nana who is alive and well and being amazingly strong through all of this. My grandparents are very generous people. Always an open door, warm bed, food if you need it! (I lived there for a while when I was 18). Here Nana is trying to wrap her head around being alone, and making decisions alone for the first time in 65 years and every time I visit she asks me to look around and take what I want from the house before it gets packed away. She has made the decision to head in to a retirement complex, which will help with cooking and be some company for her but still close by so we can all still be there to spend time. Anyway, my mom keeps saying even if I don’t want anything I should just take a look to make her happy. Honestly I’m not super comfortable going around someone’s house and saying yes I want that, but Saturday I stopped by with my oldest for a visit and there were piles of things Nana, mom & my aunts had gone through and wanted me to look at. Most of them were craft supplies, which yay and then there was a pile of scarves. So from this pile I grabbed this one:

DSC_0183

I knew I wanted to make it in to a shirt and thought I wanted to find a brown tank top or t-shirt to cut off and then have the scarf be the bottom. Flash forward to last night when I was staring at my closet and wondering what to wear out to dinner with a girlfriend. Sometimes I have all these refashion ideas dancing in my head that I haven’t had time to do and then I look at my closet and feel really dissatisfied and annoyed by my time constraints! So I’m standing there staring and the kids are in the bathtub while my husband supervises (that’s his time with them most days) and my youngest is pouring water with her bathtub tea set and my oldest is doing who knows what while loudly singing karma chameleon (not kidding) but to a 4 year old this is comma chameleo over and over and over and over 🙂 So I dug through my drawer to see if I had any brown T’s or tanks I could cut off and found an olive green one.. hey that will do. Popped my head in the bathroom and asked if they were ok. He says yes, so I said I’m just going to make a shirt real quick then. He laughed and said ok. I’m not certain he thought I was serious!

So I sewed a tube with the scarf and pulled it on to measure where I thought I should chop. And then chopped the tank. I then marked the front and sides of the scarf tube and the tank top with pins so I knew where to connect them.

DSC_0186

Pinned with a few pleats and sewed. (I would recommend you use something to re-enforce the seam, which I went back and did the following day.)

DSC_0187

I ran upstairs and gave it a quick iron. Helped with pj’s and stories and then needed to get out the door. I used my handy dandy self-timer on my iphone to capture these super high quality pics on my way out the door.

IMG_1980IMG_1981

And then took some better ones when I got home from dinner:

DSC_0190DSC_0192

Until next time,
Ashlee
Whyknotmom

Pinterest inspired shoe re-do

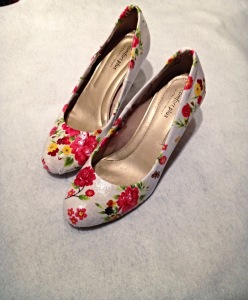
So this isn’t going to be a how to or tutorial.. As with many of my projects, when I have time, I usual sneaking in to the kitchen or sit at the sewing machine when the girls are contently playing by themselves or with daddy. Sometimes this is a 5 minute reprieve/craft time for me and sometimes it is longer. BUT since I have to be stealth about it I don’t always remember to bring the camera and/or phone in to the work space with me.. I did the first time I attempted this, but it took me 2 tries. Anyway, this is where I got the idea. I saw these lovely floral shoes on Pinterest that I loved. But I’m doing this whole -not acquiring anything new for myself- challenge in 2015 so I wasn’t about to seek these shoes out (but in the interest of full disclosure I rarely buy name brand shoes, so it probably would only have gone as far as an internet search anyway).

image2

The beautiful thing about my (and some of my co-worker’s) not acquiring challenge is that it is challenging me. It’s not super far fetched for me to not buy anything for myself for a while. I was going a long time between buying anything for myself since my kids were born BUT for some reason trying to eliminate it completely is adding a little extra fuel to the refashioning fire. Meaning were it not for this challenge I probably would have sat on the couch, or enjoyed a cup of tea, or worked on our taxes, while the kids occupied themselves this weekend rather than trying to create a free version of a pair of shoes I saw on Pinterest.

DSC_0037

So here is what the shoes looked like before with most of what I used to re-do them. Not shown are the small craft scissors I used for trimming or the sealant I used at the end. I used a varathane you would probably use to seal patio furniture. Probably not the ideal product but it is what we had 😛 During:  This is my first attempt when I had the camera with me. DSC_0044

And the finished product:

image1

And after a day at work: photo with bad angle courtesy of: Kassidy 4yo.

Until next time,

Whyknotmom,

Ashlee

Ready for spring blazer

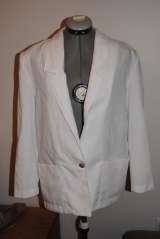
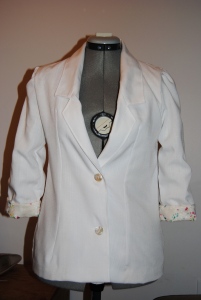
I have another blazer re-fash for you. I don’t often go to the thrift store with a specific item in mind to refashion, but after a BAD household Sickuary… (actually I have a much worse name for February, but I will keep it clean) and lots of time on Pinterest looking at mindless things like “women’s fashion” I had a whilte blazer in mind. Since we have had hints of spring weather here lately I thought I would bump it to the top of my refashion list.

DSC_0008

So I did find this large one. It almost looked more like a lab coat than a blazer. Couple of pros and cons. Con: Polyester and rayon. Enough said. Con: not lined and very see-through. Pro: made in Canada! Pro: a couple of sizes too big. The reason I like to buy blazers big is because I am pear shaped. My dress form doesn’t truly go small enough to represent my (sad) small, post children bust and it’s open quite a few notches on the hips. Anyway, I have found that I get a fit I like better if I start big and then do the alterations.

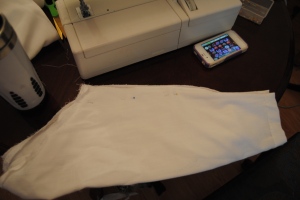
First things first.  I had to take the monstrous! (you will see a pic later) shoulder pads out, pockets off and then the arms off as I needed to take in the shoulders.  Then it was a matter of tailoring:

DSC_0019DSC_0018

Then the arms had to be taken in a bit:

DSC_0021

Multi-tasking with my MyVegas game.. trying to earn free things for my upcoming trop to Vegas!

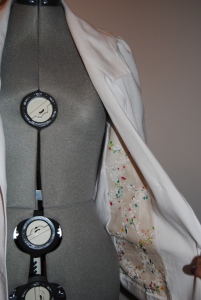
So then I sort of lost interest with my camera a bit.  Truth is I have absolutely no idea how to properly line a blazer.  I completely winged it and made it up as I went along, and consequently forgot about taking pictures.  I used this lovely double gauze I had in my stash.  Lined the arms and the front panel with this and then a very thin white jersey for the back.

DSC_0011

Lastly steps: I made a second button hole and moved the original button.  I cuffed the arms and hand sewed them in to place and also took up the hem a little bit and hand sewed that as well. Then I made some new shoulder pads with the pockets I took off in the beginning.

DSC_0023

Doesn’t really show how thick and horrible these puppies are!

Frankly I’m pretty surprised it worked out as well as it did (the lining I mean).  Here’s the after:

DSC_0031DSC_0030

And after a good press and on ma bod:

DSC_0033

Until next time,
Ashlee,
Whyknotmom

Craft therapy dress remake

It has been a long week and a half in “camp Messam” as one of my friends likes to refer to our house. My husband went away for a week long vacation and both kids took turns being sick pretty much the whole time. I thought he would come back and I would be able to get to all of the (real jobs) work I had missed but alas he came home with a man cold so my time has been limited. I’m almost caught up now but I’ve been a bit of a stress case…Thank goodness today is a holiday and Dave is feeling good and gave me the day. I decided to take this morning to have a little bit of craft therapy before I head back to the office.

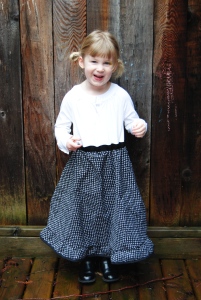
Whenever the creative bug bites or the need for craft therapy is there I have a stash to pull from. Some of these things come from thrift shopping and left-overs from other projects but a lot has been given to me. The dress for this project came from a good friend from high school. This was a brand new size 8 sundress. I decided to add it to a hand-me-down shirt from my niece. Looked like it had never been warn (no before pic sorry).

DSC_0009

The before

The dress was very long so I did have to take a bit out of the length… but since I really don’t like hemming and the bottom was already finished I decided to cheat and use the hem and take the length out in a bit of a different way 🙂  Cheater cheater!

DSC_0012

  CHOP!

The t-shirt before

The t-shirt before

Then I took an old fabric belt I had kicking around and made an elastic casing for where the t-shirt and dress were attached together.  Totally optional but I just thought it would make it look a bit more finished.

DSC_0016

Here she is:

DSC_0017

DSC_0026

Now, if I had it to do over I would use a thinner belt or a piece of fabric as the belt/elastic casing.. It doesn’t sit totally right to my critical eye. She, however, doesn’t care, doesn’t want to take it off and will be adding it to her dress rotation.

Until next time,

Ashlee
Whyknotmom
Up-cycled packing peanut valentines

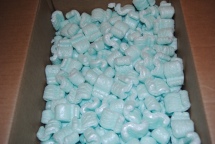
I dropped my kiddos off at daycare this past week and grabbed the annual lists of names for Valentines.  Not something that is mandatory to participate in but we’re all about cheesy holidays and even more about the crafts that go along with them in our house!  I will admit, however, that this year I did have a bit of anxiety about the number of them we would have to make.  With the girls in separate rooms at the daycare that leaves us with about 50 to make once you factor in teachers.. Luckily one of my co-workers received a lovely box of chocolates all the way from Hawaii (yes she shared, mmm) and in the box were these babies.. big surprise no one else wanted them.

DSC_0001

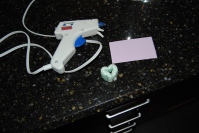
So I grabbed a few supplies from my craft stash and we got to work.  Cut out cards the size of business cards:

DSC_0003

Trimmed down the packing peanuts with some help:

DSC_0011

Glued them on:

DSC_0007

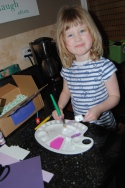
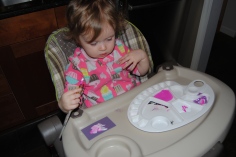
And then let the girls go to town decorating.  I decided to leave the packing peanuts off of the valentines for Skyla’s little (baby) friends.. safety first!

DSC_0014 DSC_0013

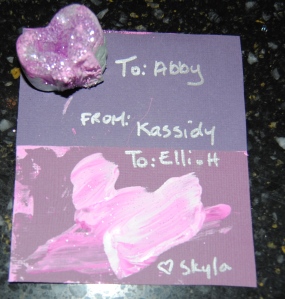
and here they are.  We still have a few more for Kassidy to paint.. Skyla was a machine and did all of hers super fast!

DSC_0017

Until next time,
Ashlee

One for the little lady

I am a lucky women with a husband who does a lot around the house! We both work but I do some extra work in the evenings (no not this) to bring home some extra bacon. Whenever I have a heavy work week he picks up the slack on laundry and cleaning. Most of the time this is good. Sometimes this is not. Hey look I have an example to show you:

2015/01/img_0092.jpg

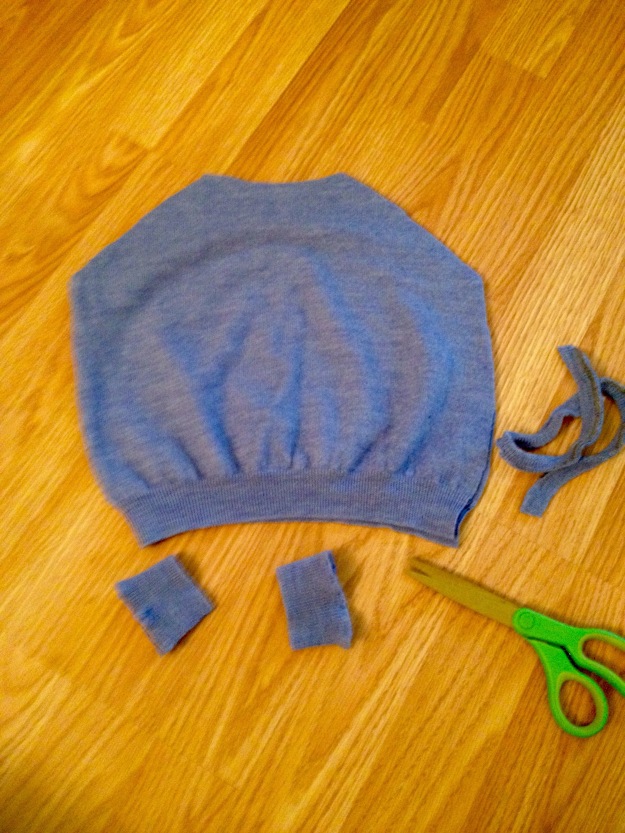
The blue (was) a men’s large sweater. Now not big enough for me… Barely bigger than the 2t sweatshirt I used as a template.

Chop!

2015/01/img_0096.jpg

Embroidered on some patches to cover up what look like moth holes.

2015/01/img_0052.jpg

Added some jersey sleeves. Used the sweater for the cuffs and here you have it:

2015/01/img_0091-0.jpg

2015/01/img_0098-0.jpg

2015/01/img_0090-0.jpg

Until next time,
Ashlee
Whyknotmom